
In the short time that we’ve owned our motorhome – a 2008 Winnebago View 24J – we’ve made a few modifications that we’re really pleased with. These include replacing the “house” radio/CD/DVD player in the galley with a framed photo of our backyard and installing a unit into the dash that can handle all of our media needs; adding swivel adapters to the seats up front; installing USB power outlets here and there; and a handful of power-related upgrades.
This is kind of a geeky post, so if that sort of thing interests you, do keep reading – if not, you’ve already got the gist of it.
Media/electronics:
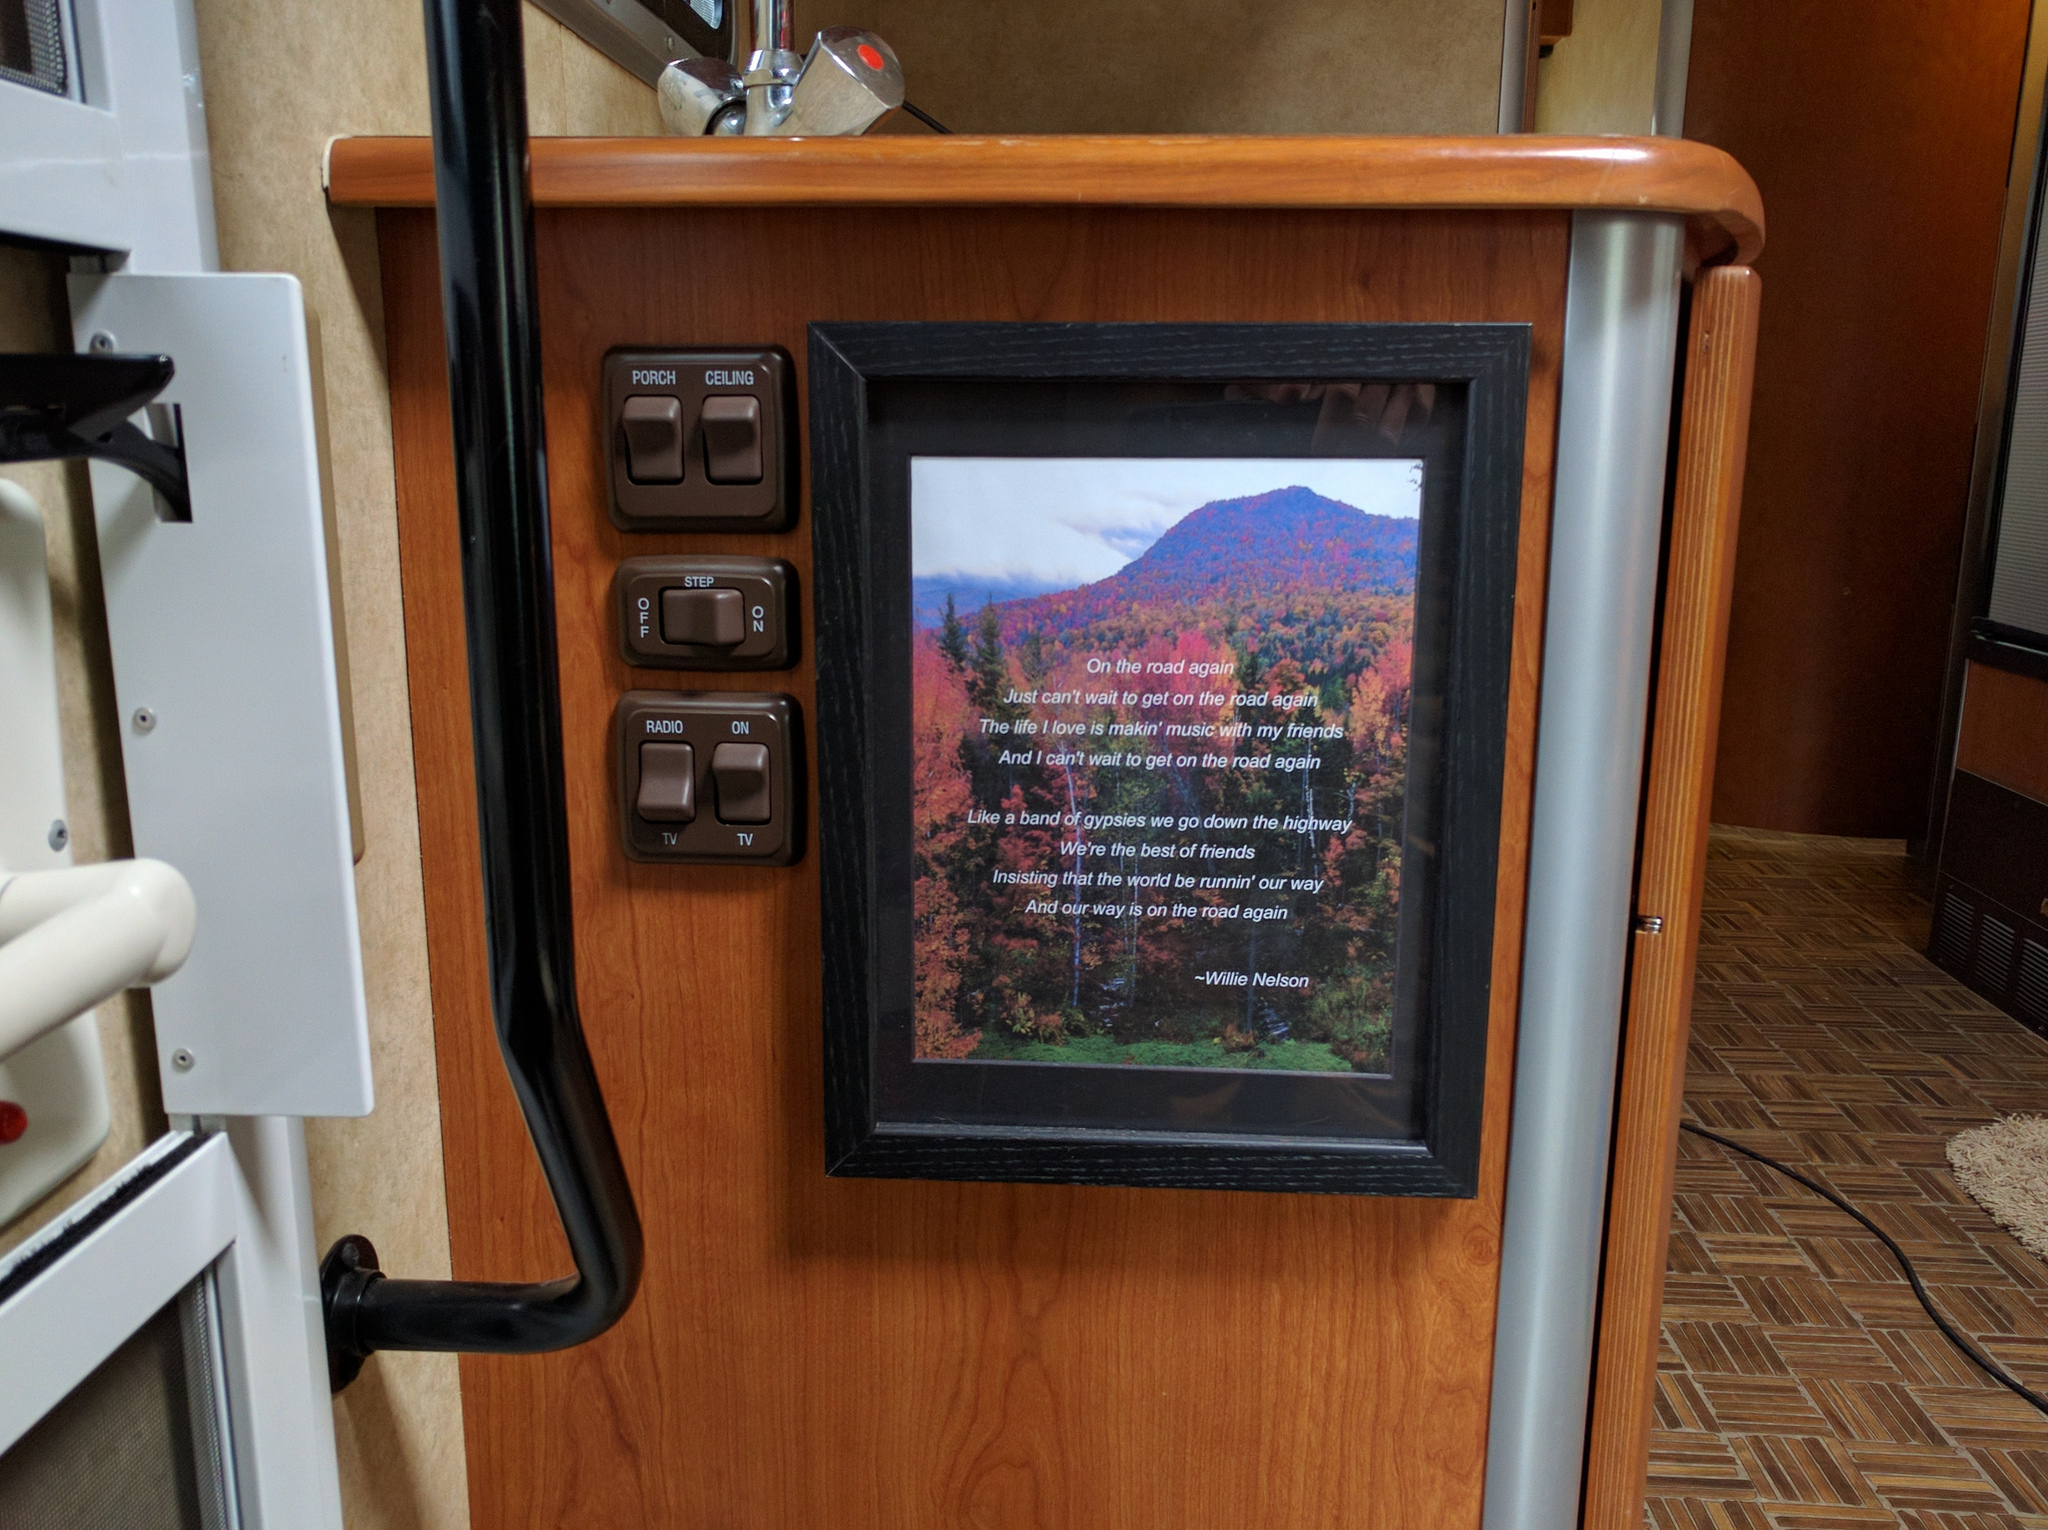
I replaced the mostly redundant (and, in our case, malfunctioning) OEM Jensen DVD/CD player in the galley base cabinet with the aforementioned framed photo. I also replaced the original 19″ TV above the door with a bigger-screen model that is about the same size overall (so it could fit in the same place!), replaced the batwing TV antenna with a King Jack antenna, replaced the OEM Sony dash radio with a Pioneer radio/DVD/touchscreen/bluetooth/speakerphone/SiriusXM receiver and wired the TV up to that (instead of to a separate unit in the galley). The original wiring was set up so the dash radio can play through the coach speakers (which are not bad!), and that still works as before with the new receiver.
(We have a Flickr album with a few more photos of the AV upgrade: Link)
I ran into a couple of complications with this upgrade. The first was the dashboard. Although the original radio installation on the surface looks like it’s a straightforward single- or double-DIN-compatible dash so that all you’d need to do is buy is a Sprinter adapter kit and screw it in place (like you’d do in any normal vehicle), it is NOT. It is a non-standard assembly, made specially for Winnebago I believe, to hold that Sony radio (and only that brand and size radio) without any adapter whatsoever. I was able to convert that assembly into a workable carrier for the Sprinter kit I had bought with about a day’s worth of iterative Dremel-tool mayhem, but that was scary. Had I failed, the alternative would have been to chase down an OEM Sprinter dash center console radio bracket from Mercedes (not the Winnebago special) and start over with that.
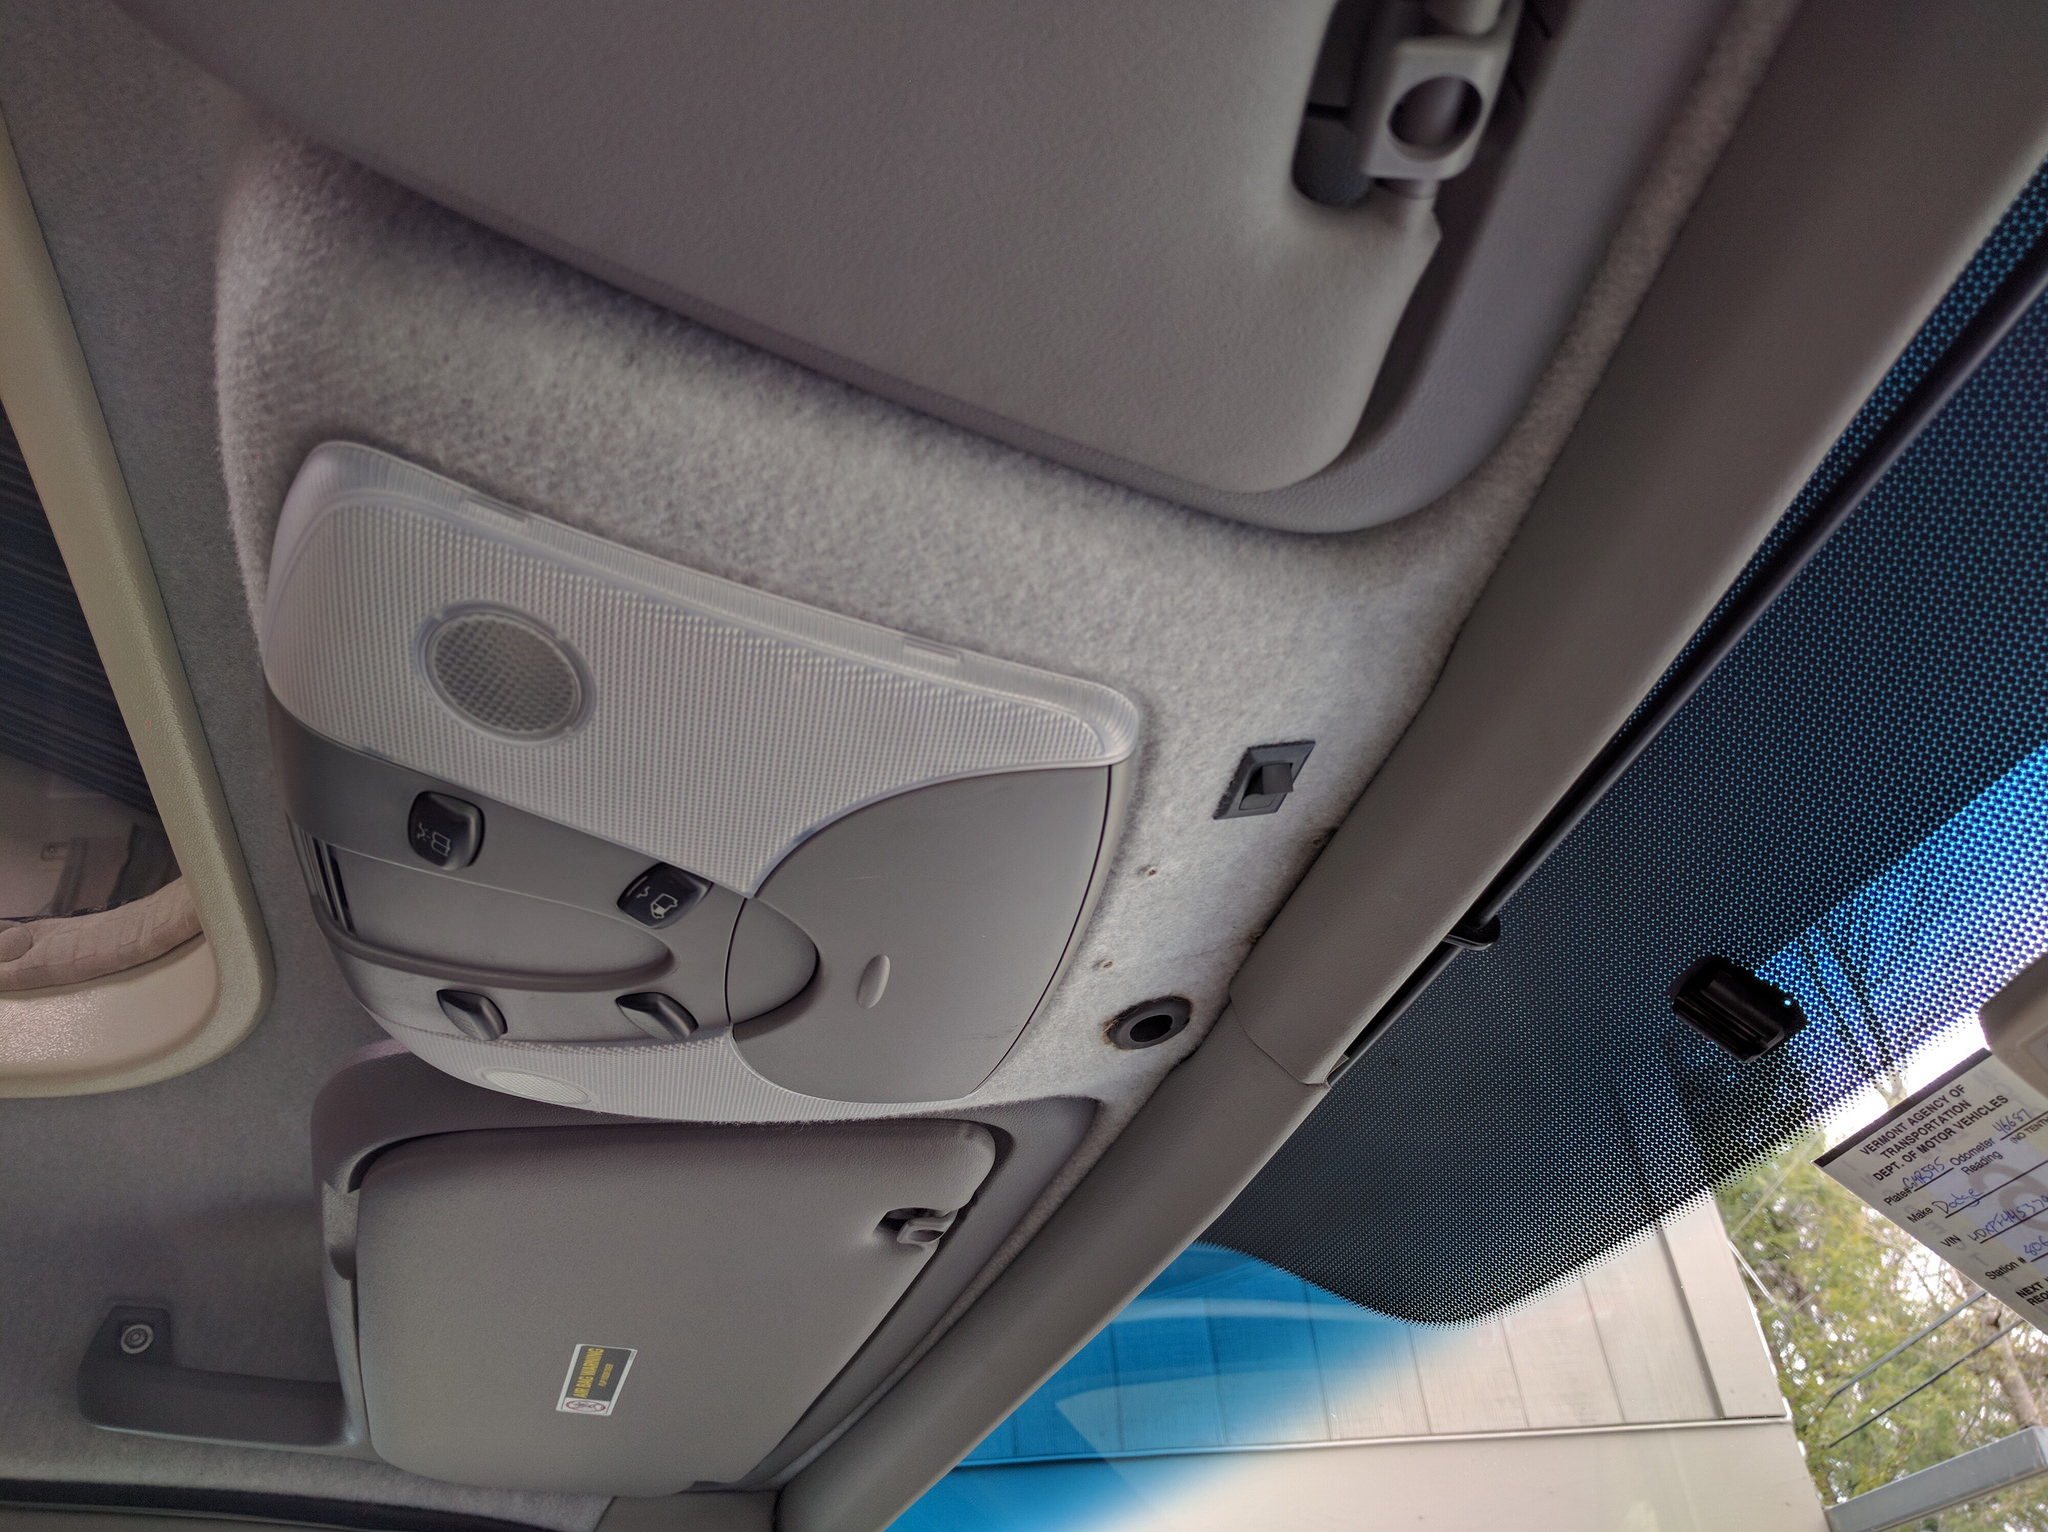
Second, all the cabling from the TV was routed to the rear, through the overhead cabinet above the sink, behind the microwave, down the closet wall to the back of the base cabinet, then forward again to the Jensen CD/DVD player I was removing. (Not sure I had to pull it all out, but I did, and in the process gained a thorough understanding of the mechanicals in that part of the RV, so it was not a complete waste of my time.) Finding a path from the TV to behind the center of the dash was…challenging. I wound up routing the cables into the over-cab side wall just ahead of the TV, down under the floor of the overhead berth, over to the center of the berth, then forward into the dome light area. The rearview camera wiring also had its connections here, which was convenient. From there, I went across to the passenger side A-pillar, and brought everything down to the footwell behind the A-pillar cover (it includes the windshield privacy screen), across under the glovebox, and up through the center console. The tricky part was finding my way to the dome light – every other path I could imagine involved going outside through the floor or drilling down through the steel roof of the cab.
Rearview camera display:
The new receiver was built for backup camera display, so I scrapped the overhead rearview monitor screen and wired the OEM camera to the in-dash receiver. (Jensen makes an adapter for that.) I added a switch to the rearview trigger wire so we can view the backup camera on the dashboard display whenever the engine is on, even if we’re not backing up. It is a SPDT on/on rocker switch up by the dome light; in one position the reverse trigger passes through like normal, in the other position +12V is sent to the trigger regardless of the transmission or reverse lights. Here is a photo of where the screen used to be, and the new switch:
Convenience features:
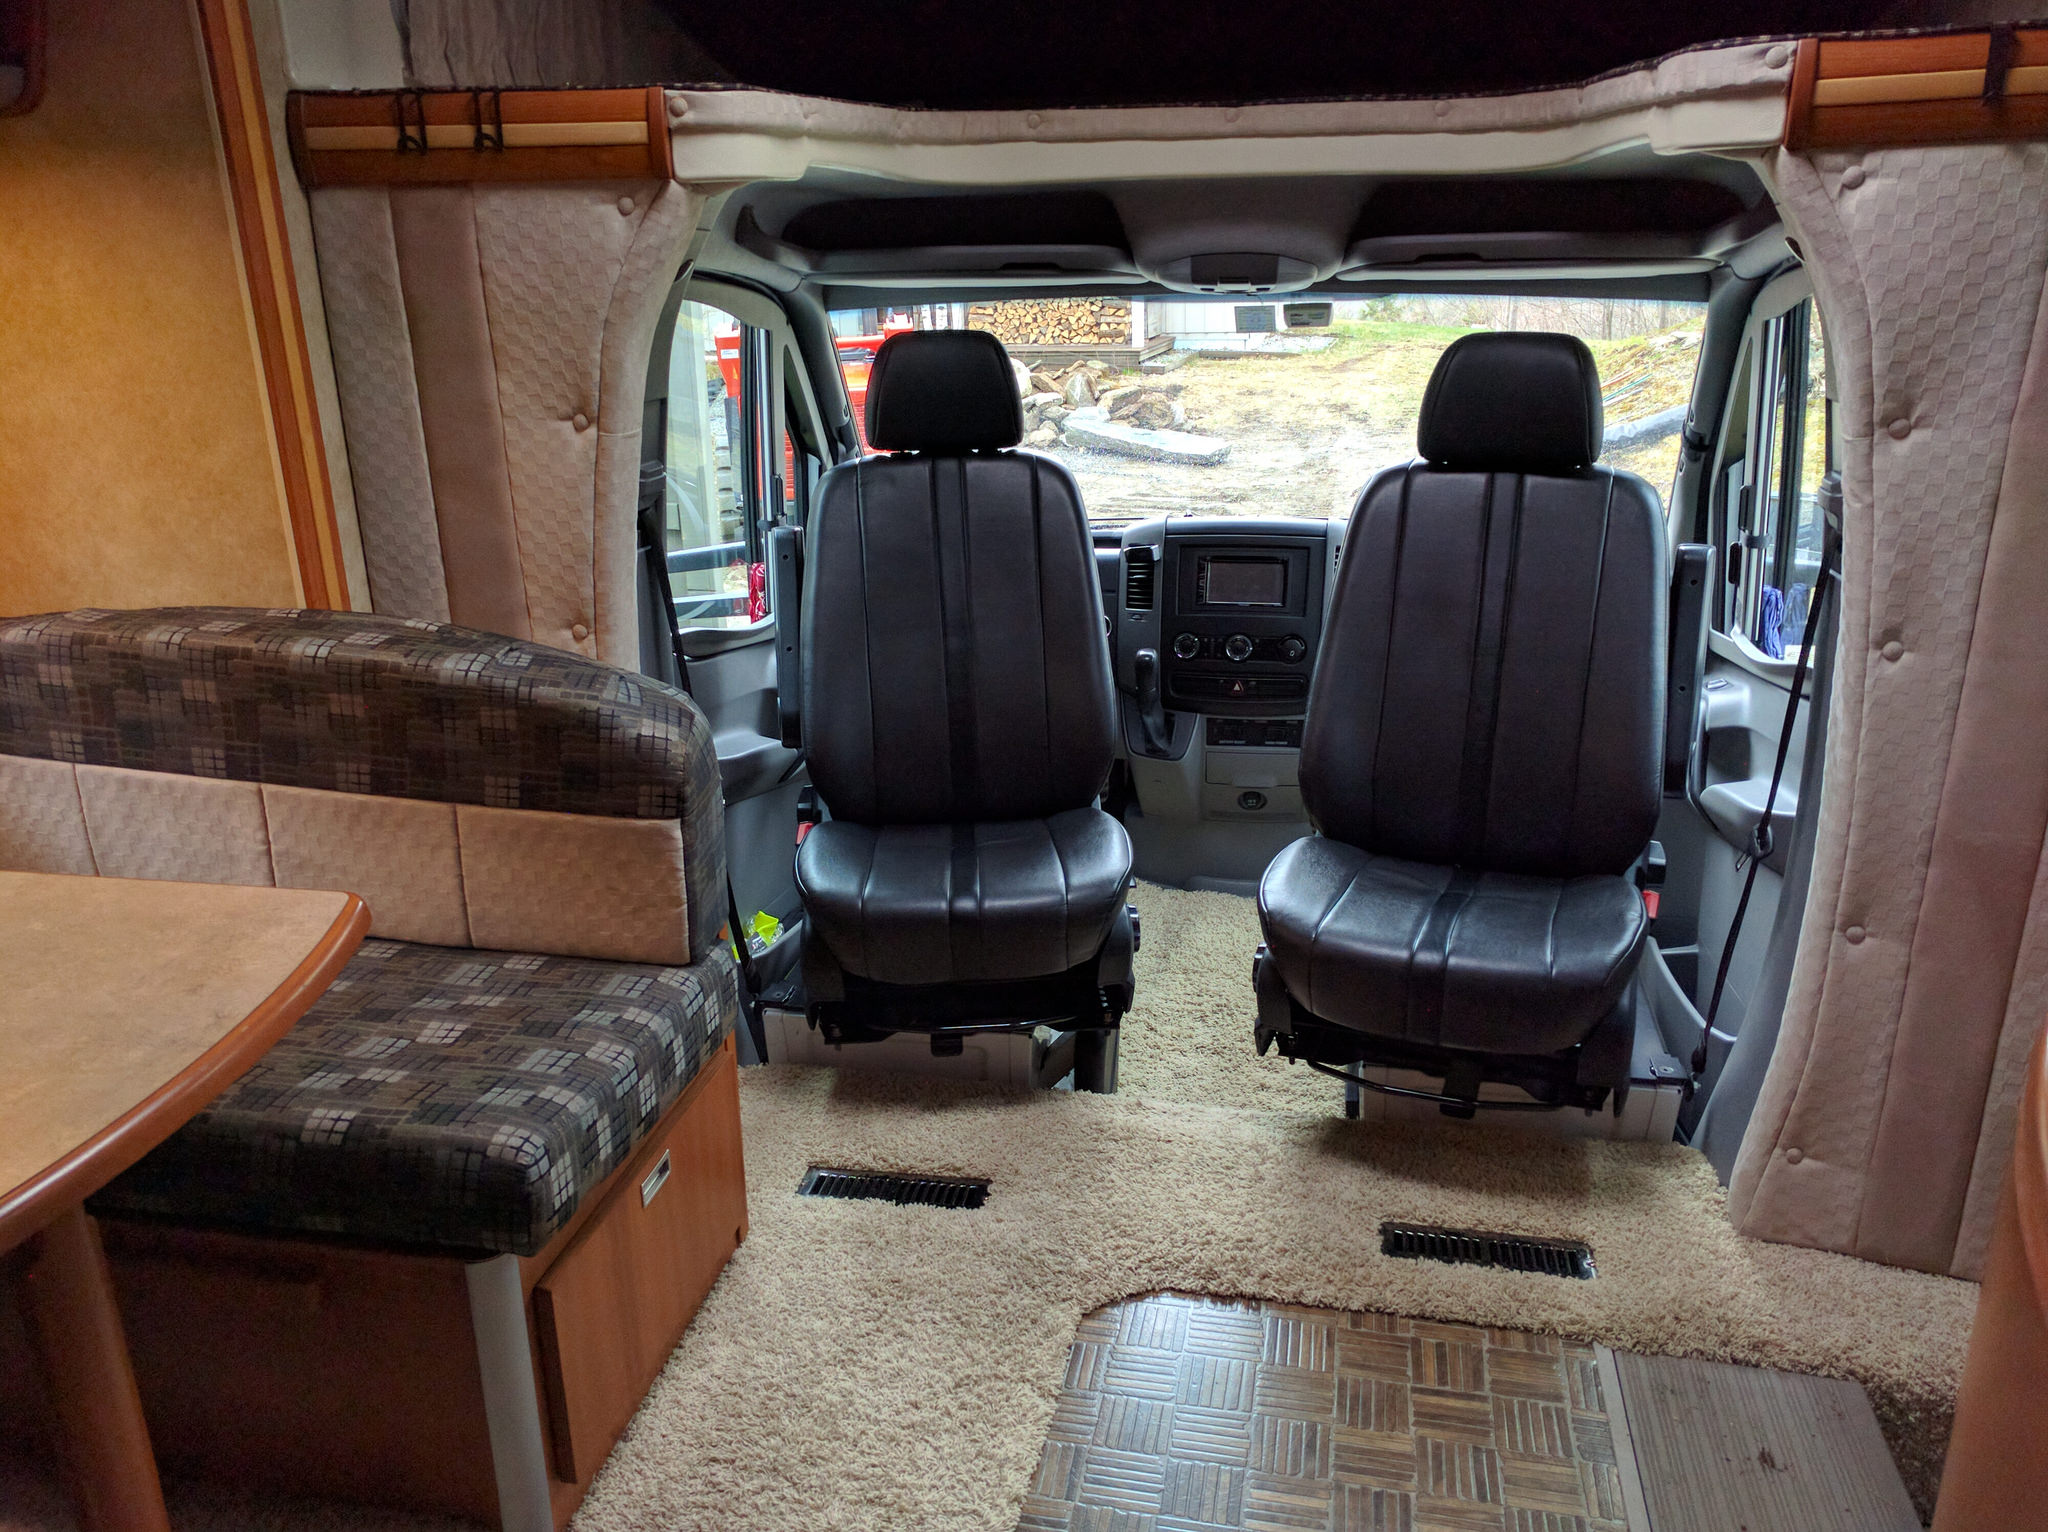
We elected to install swivel seat adapters on both driver and passenger seats. These adapters are expensive, heavy, a pain to install, complicated to operate – and I wouldn’t be without them! They are really great to have.
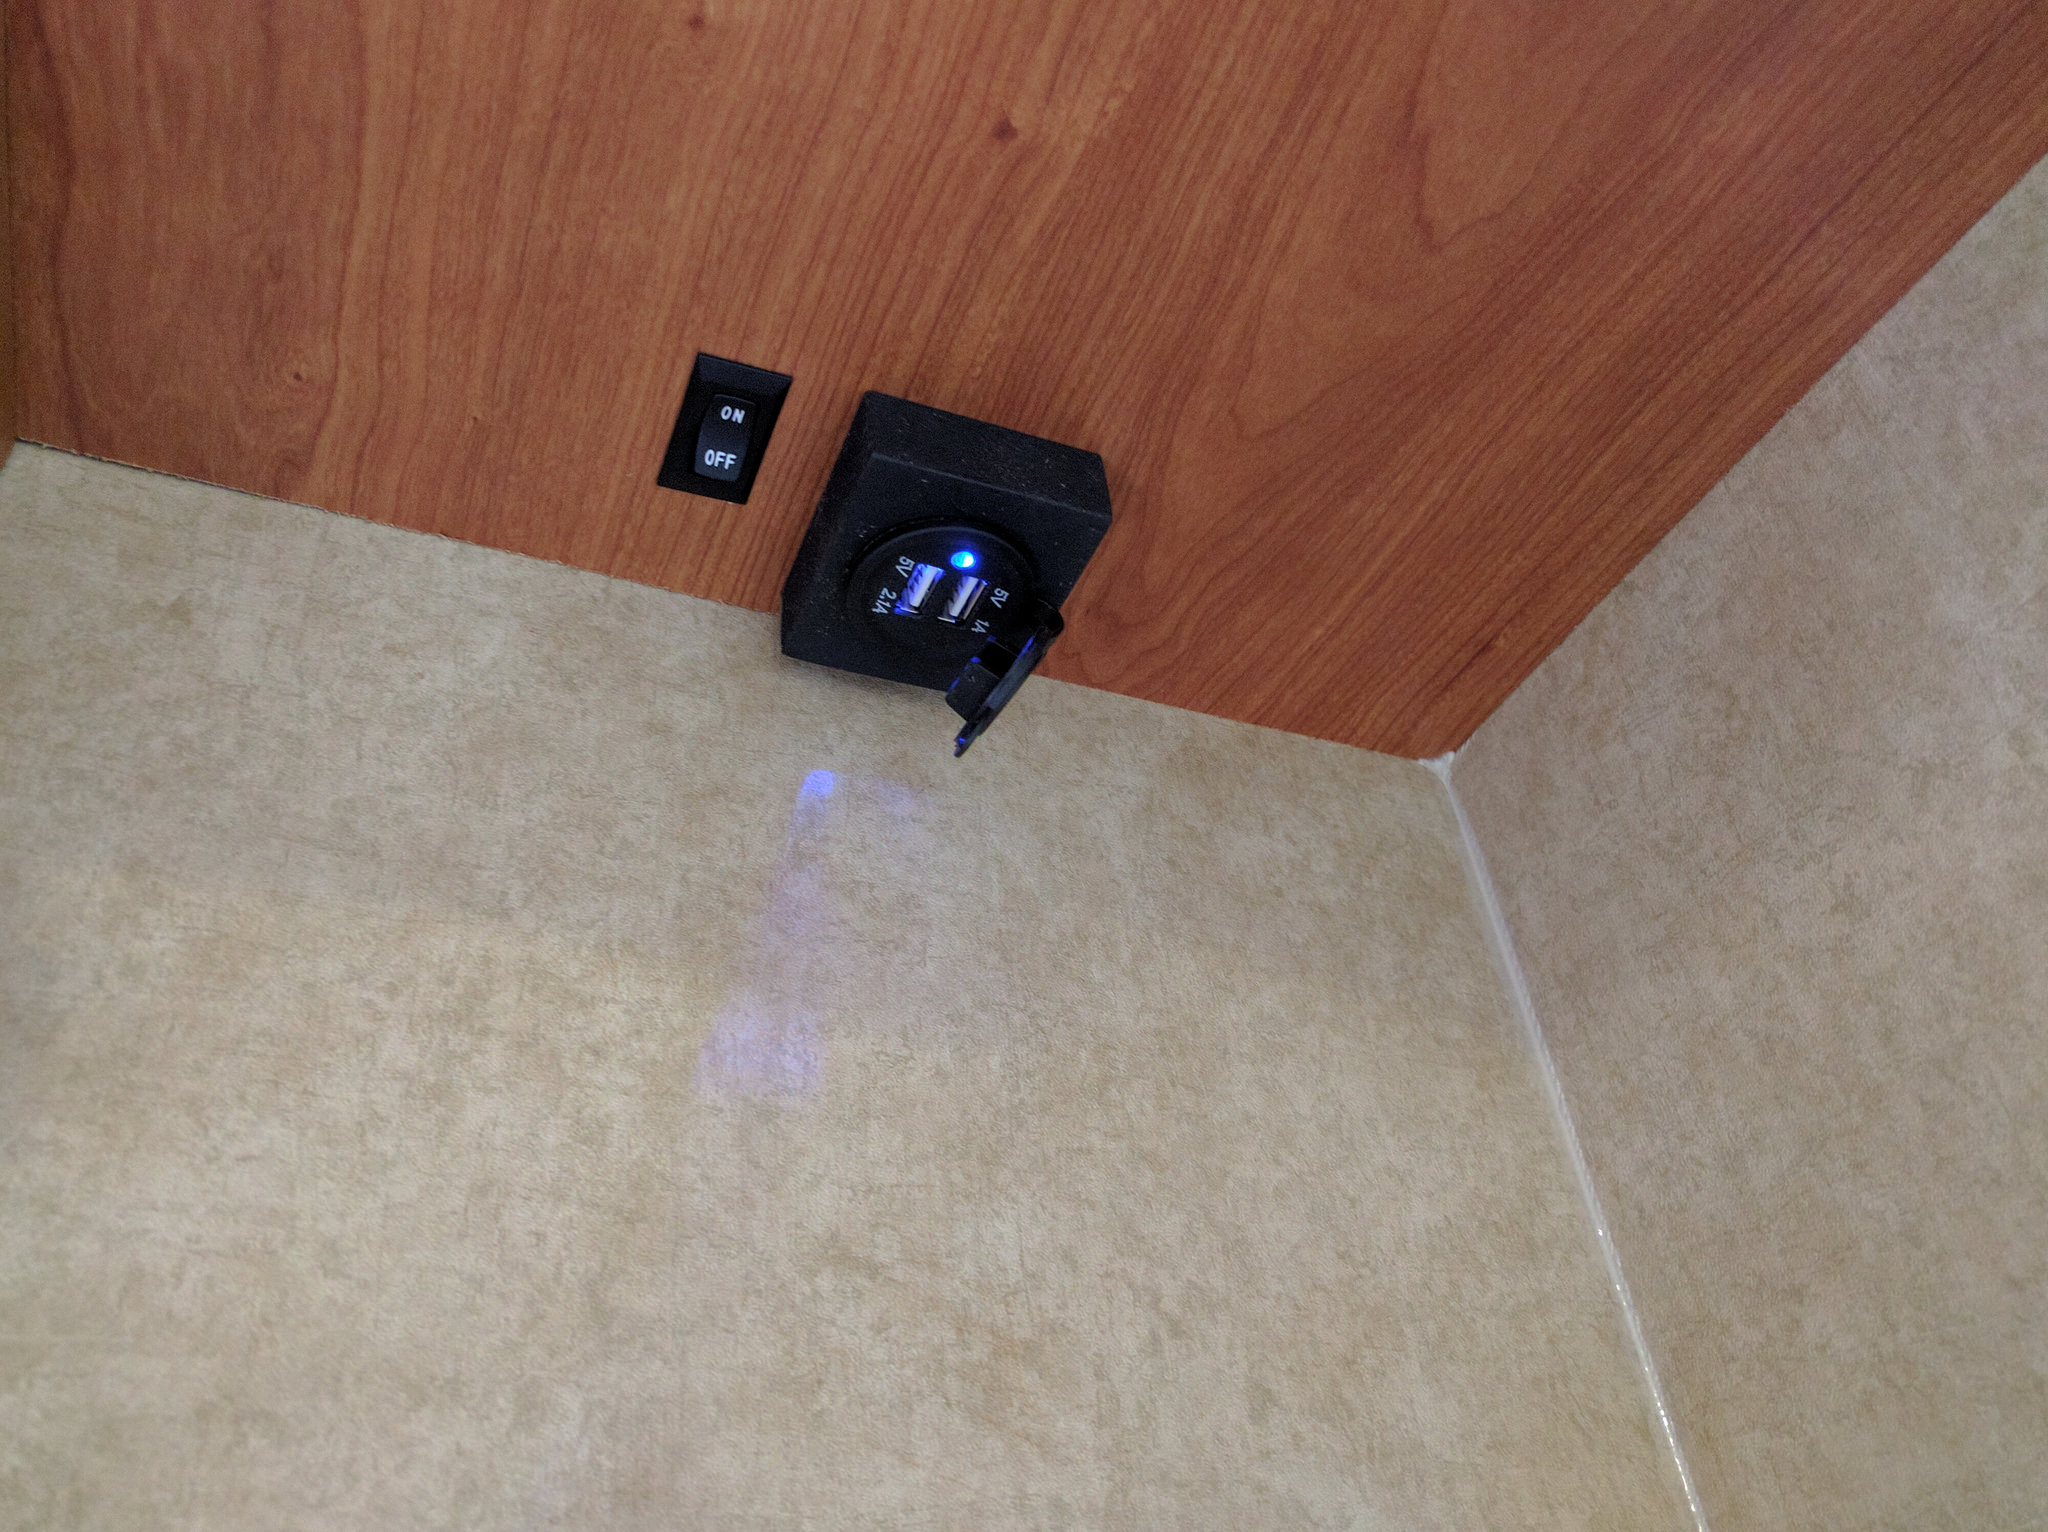
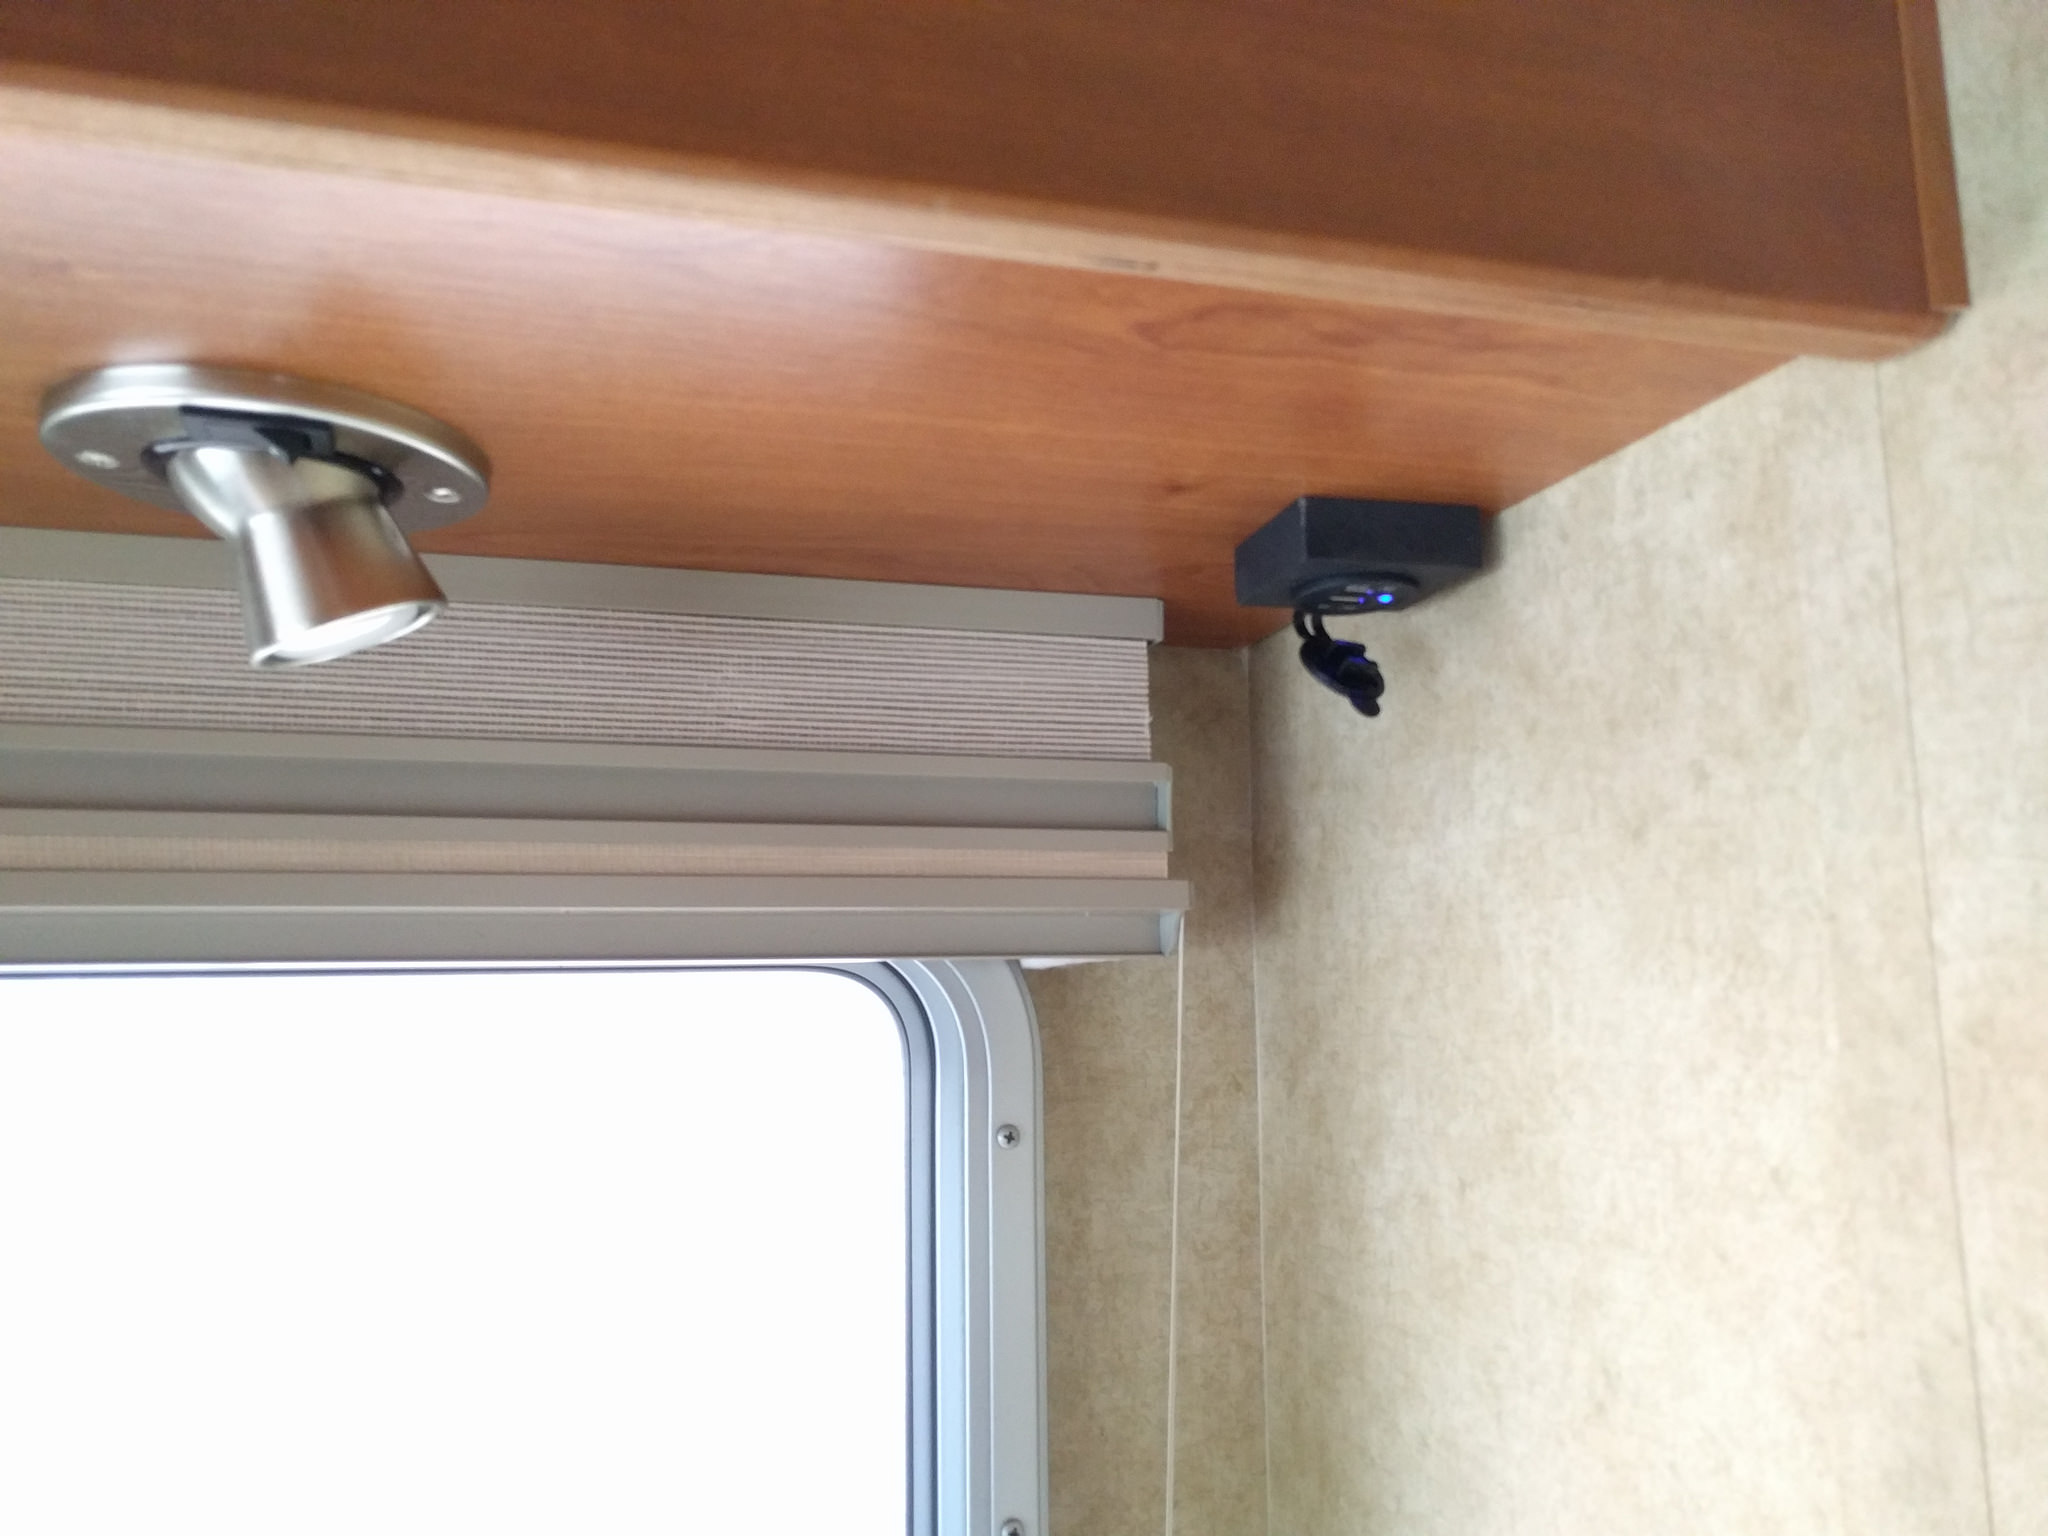
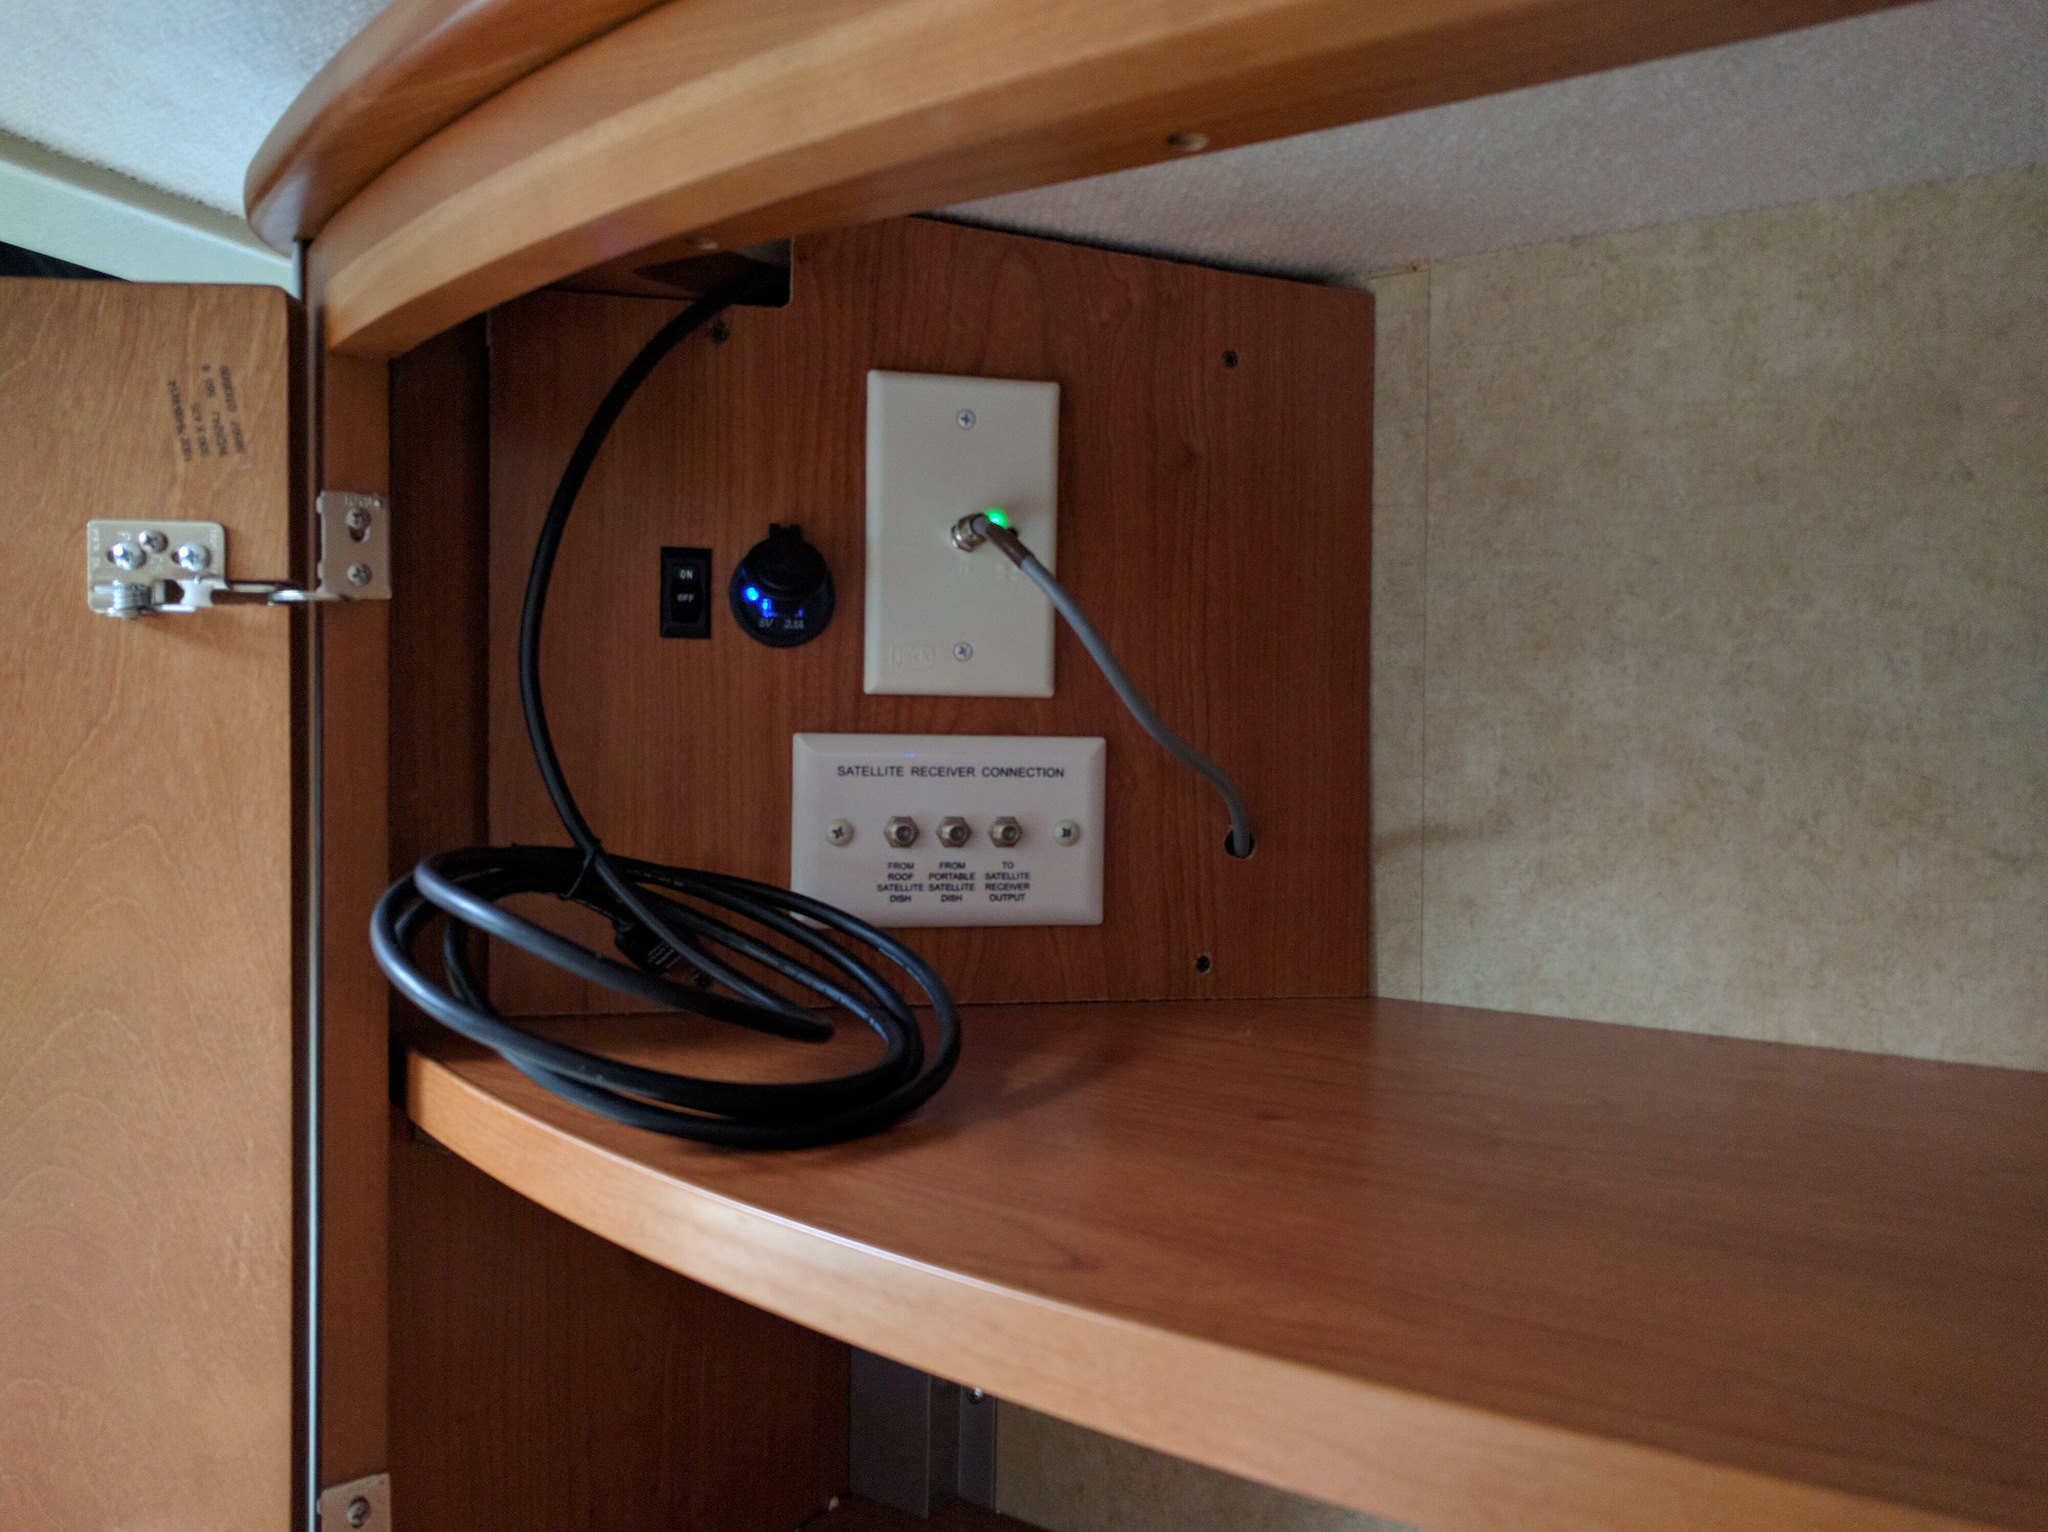
I added USB outlets under the overhead shelf in the bedroom area for charging phones. These are 12v to 5v converters that I wired into the light circuit that was already there. I also put one inside the kitchen cabinet above the sink, where there is wiring for cable TV and various antennas, which will power the cellular wifi hotspot and a ROKU stick. I put these outlets on switches since they draw a small current when they are live, even with nothing plugged in to them.
Power management:
One of the first things we did when we got the rig was to replace all of the coach bulbs w/LEDs. Running every light in the house now draws less electricity than a single ceiling fixture did before the swap.
Another early mod was to replace the original, single-stage power converter with an updated, multi-stage model. This became necessary because the original converter shorted out when some mice built their nest on top of it and proceeded to saturate the circuitry with their urine… I’m thankful to them, though, because this new converter is much better for maintaining the batteries and at the time I didn’t know enough about RV power to be concerned.
I also replaced the original 80-amp-rated battery combiner/boost solenoid (which had failed!) with a heavy-duty unit rated for 200 amps. This relay connects the coach batteries to the alternator for charging, as well as to the chassis battery for a jump start. As a result of the repair/upgrade, the coach batteries once again charge when the engine is running (as they are supposed to do!) as well as from the converter, and the jump-start feature works. Yay! For completeness, I installed a Trik-L-Start unit so the chassis battery charges when the coach batteries are being charged from shore power through the converter, instead of only from the alternator. With this setup, if any battery is charging then all the batteries are charging – and as a result, I sleep better.
Still thinking about:
ScanGauge II, TPMS, Solar panels
Hello there
I’m 2008 Winnebago view owner looking for an original Jensen radio. By chance do you still have your original factory radio?
Chad
111boat@gmail.com
Hello Chad, no we don’t have the original Jensen unit. It looked like it had been damaged (probably by water from the plumbing behind it, not sure) and it was not working when we bought the rig, so I removed it and disposed of it.